Key Takeaways:
💡 LinkStack is a free, open-source alternative to Linktree that can be self-hosted on your Synology NAS, eliminating monthly subscription fees while maintaining full data control.
💡 Installation requires basic Docker knowledge and takes about 15 minutes, with the platform consuming minimal resources (less than 100MB RAM) while offering features comparable to premium link-sharing services.
💡 The platform provides extensive customization options, built-in analytics, and team collaboration features while maintaining user privacy and security through self-hosting.
Looking for a free alternative to Linktree? Meet LinkStack, an open-source solution that puts you in control of your link-sharing platform. As a content creator, I needed a cost-effective way to share multiple links with my audience. After discovering LinkStack, I found it offers the same functionality as Linktree but with added privacy benefits and no monthly fees.
Check out my linkstack link here!
LinkStack lets you create a customizable landing page for all your important links. Think social media profiles, websites, or any online content you want to share. The best part? You can host it on your Synology NAS, giving you complete control over your data.
I was skeptical about the installation process at first. However, it took me just 15 minutes to get everything up and running on my Synology NAS. This guide will walk you through the entire setup, from initial installation to customization.
Whether you’re a blogger, entrepreneur, or social media enthusiast, LinkStack offers a robust solution without the premium price tag. Stay tuned as we explore how to set up your own LinkStack instance and break free from subscription-based link-sharing services.
Why Choose LinkStack?
LinkStack stands out as a compelling Linktree alternative that puts you in control. Unlike its commercial counterpart, this open-source solution lets you host your link-in-bio platform without monthly fees. Your data stays on your hardware, protected from third-party access.
Performance metrics show LinkStack consuming minimal resources. It runs smoothly on a Synology NAS, using less than 100MB of RAM and negligible CPU power. This efficiency means you won’t notice any impact on your other NAS applications.
The self-hosting approach brings unexpected benefits. You can customize every aspect of your landing page without restrictions. No more premium tier requirements for basic features like custom CSS or removing branded elements.
Security-conscious users will appreciate LinkStack’s transparent codebase. The active GitHub community regularly reviews and updates the software, catching potential vulnerabilities before they become issues. This level of scrutiny isn’t possible with closed-source alternatives.
Cost comparison reveals significant savings. While Linktree charges up to $24/month for premium features, LinkStack delivers the same functionality for free. The only cost is the hardware you already own. For Synology NAS users, this makes LinkStack an obvious choice.
Prerequisites for Installing LinkStack
Before diving into LinkStack installation, your Synology NAS needs to meet specific requirements. First, ensure your NAS runs DSM 7.0 or later. The system needs at least 1GB of RAM and 1GB of free storage space for smooth operation.
Container Manager is essential for this setup. Check if it’s available in your Package Center. If not, your NAS model might not support Docker containers. You’ll also need Web Station installed for proper web hosting functionality.
Network configuration requires port 80 and 443 to be accessible. Set up a reverse proxy through Synology’s built-in Reverse Proxy feature to handle secure connections. This step ensures proper routing of web traffic to your LinkStack instance.
Basic networking knowledge helps tremendously. Understanding concepts like DNS records, ports, and IP addressing will make the installation process smoother. Familiarity with Docker containers is a plus but not mandatory.
Keep your DSM updated to the latest version for security and compatibility. Back up your system before starting. This precaution ensures you can restore your NAS if something goes wrong during installation.
Installation Process
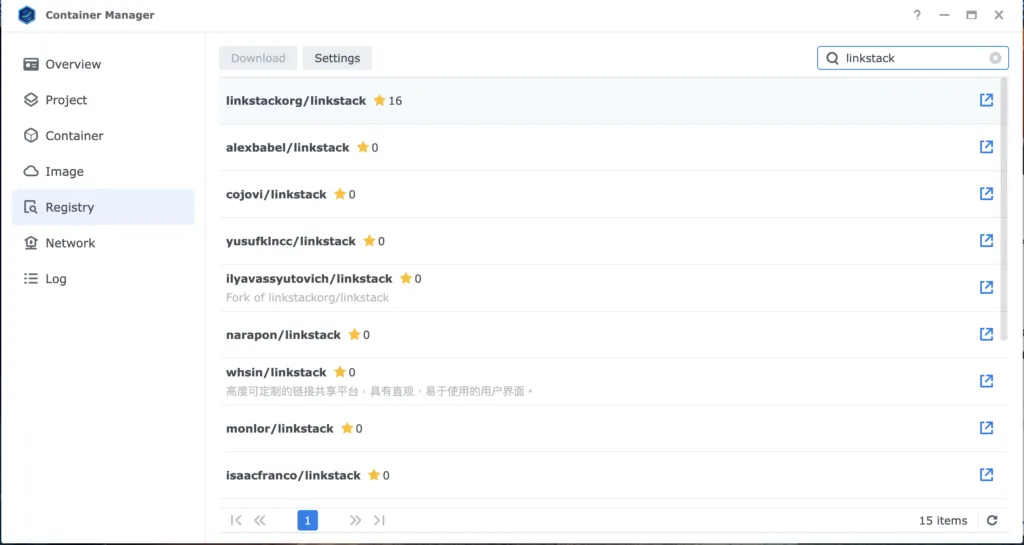
Getting LinkStack up and running on your Synology NAS is straightforward. Launch Container Manager from your DSM interface and click “Registry.” Search for “linkstack” and download the official image.
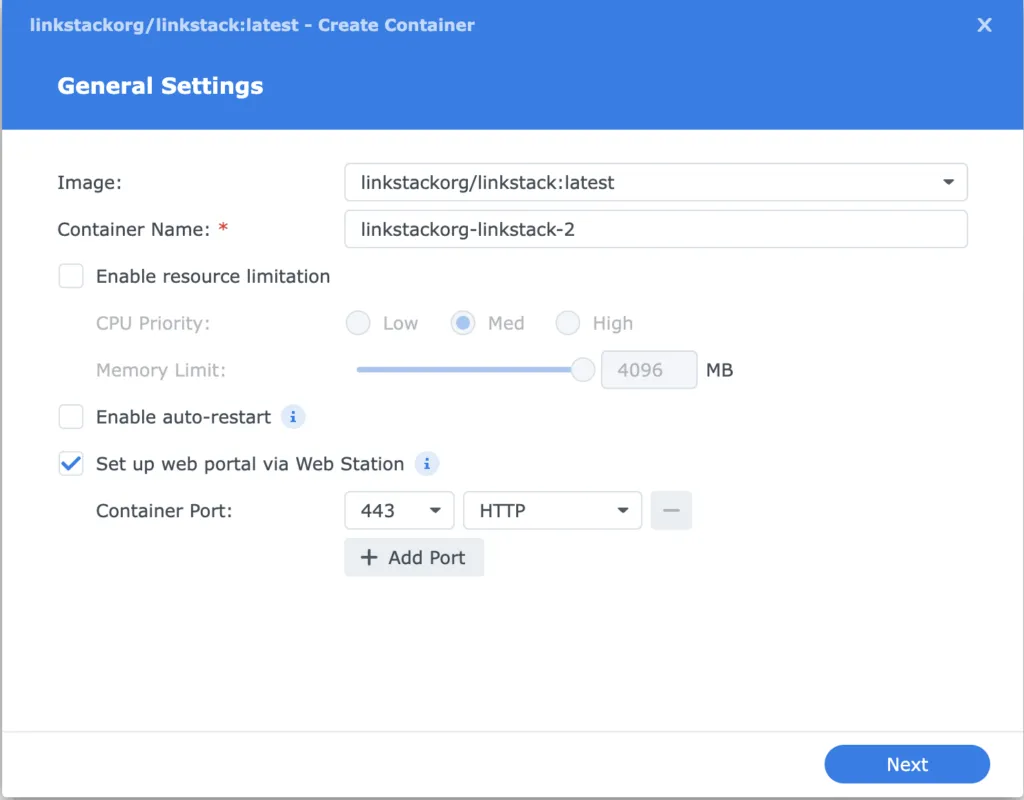
Click setup web portal via web station and choose port 443 and HTTPS.
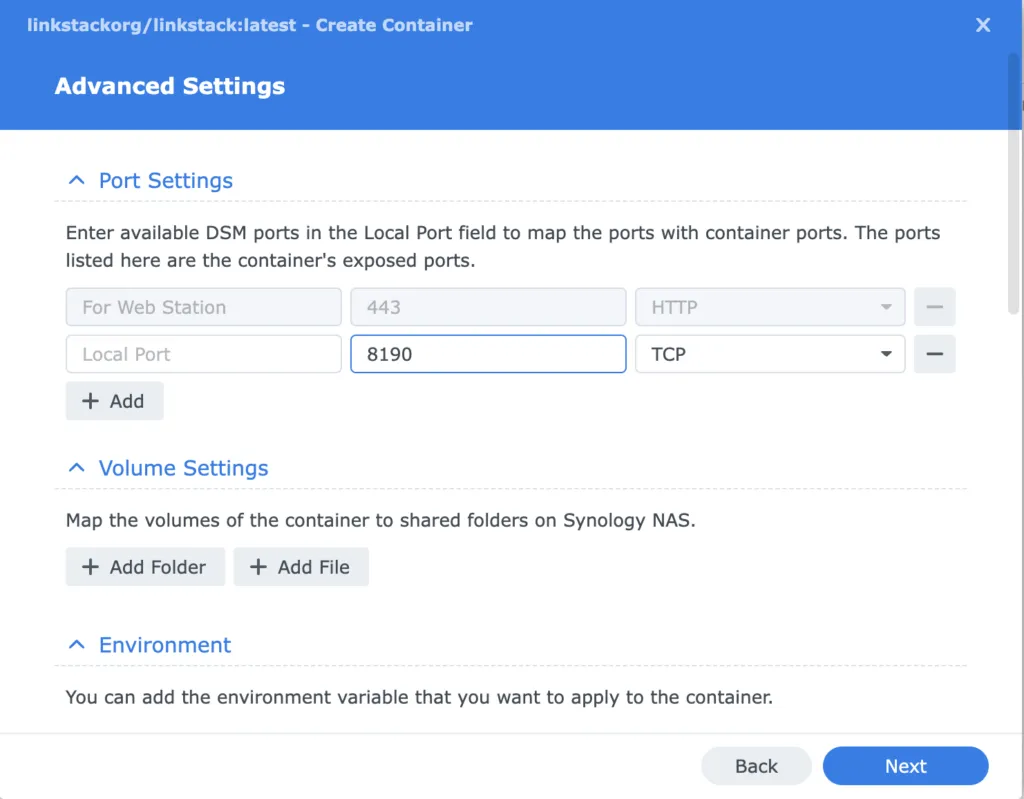
Set your local port to 8190. Click next. Select HSTS and set your hostname to linkstack.yourname.synology.me. This should allow you to install linkstack.
Configuration Steps
After you install successfully. You should be able to go to linkstack.yourname.synology.me to setup your linkstack.
Choose SQLite as your database for simplicity. It’s perfect for personal use and requires zero additional setup. For larger deployments, MySQL offers better scaling but needs separate configuration.
Navigate to the admin panel and create your administrator account. Use a strong password. It will ask if you want to enable registration, click no if you’re the only one using it. It will ask “set your homepage”. If you’re the only person using it then click yes. If you would like to share this tool with your friends and family, click no.
Finally, you can login by going to linkstack.yourname.synology.me/login.
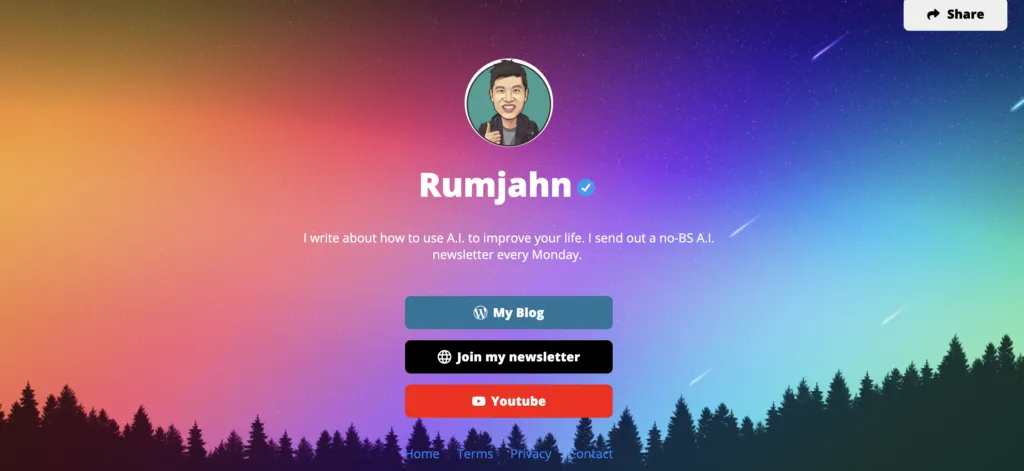
The installation was very smooth and straight forward. The CPU and RAM usage is small. I immediately downloaded a template and installed aurora template. Added a few links and now I have my own private stats of what people are clicking.
Customize your homepage by uploading your logo and adjusting the color scheme. The interface lets you preview changes in real-time. Set your display name, bio, and social media links in the profile section.
Control user registration based on your needs. For personal use, disable public registration to maintain exclusive access. For team environments, enable registration and set up email verification to manage new users.
Configure your timezone and language preferences in the settings panel. LinkStack supports multiple languages and automatically adjusts timestamps for your location. Enable or disable features like user analytics and link tracking based on your privacy preferences.
Test your setup by creating a sample link. Verify that click tracking works and your custom domain redirects properly. The system logs provide detailed information about any configuration issues.
Customization and Usage
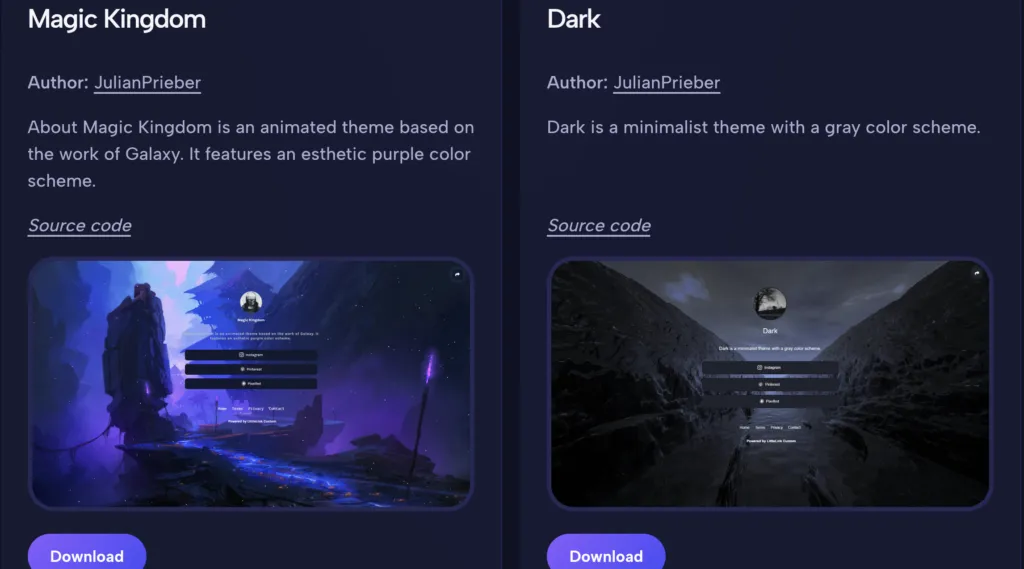
LinkStack offers extensive customization options that rival premium Linktree features. The platform’s template system lets you transform your link page in minutes. Install new templates directly through the admin panel with a single click.
The Aurora theme stands out as a stunning option, featuring smooth animations and modern design elements. It supports both light and dark modes, automatically adjusting to your visitors’ preferences. Custom CSS injection allows for precise styling adjustments without coding knowledge.
Managing links is straightforward and intuitive. The drag-and-drop interface makes reorganizing your link hierarchy effortless. Each link supports custom icons, scheduling, and expiration dates. You can also add social media buttons that match your brand’s aesthetic.
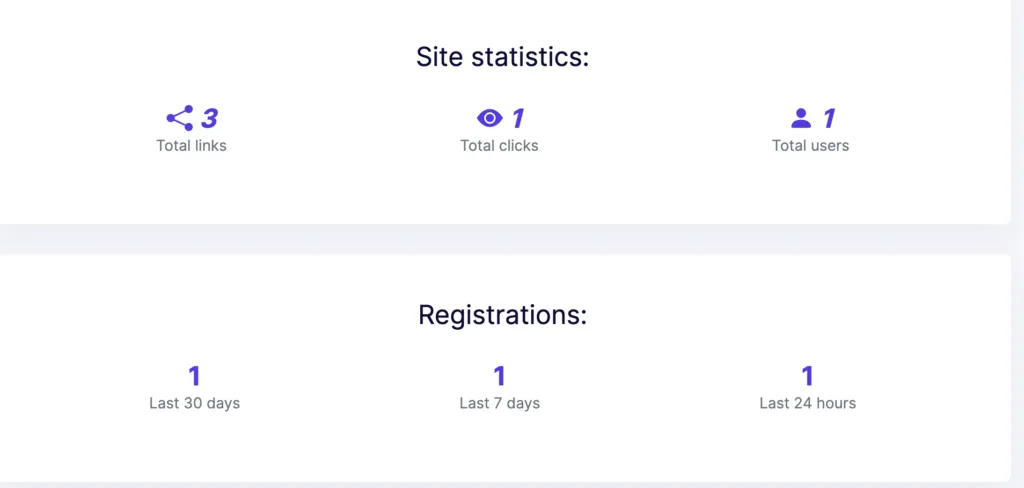
LinkStack’s analytics provide valuable visitor insights. Track click-through rates, geographic data, and peak traffic times. The built-in statistics dashboard displays clear visualizations of user engagement patterns. Real-time monitoring helps optimize your link placement and timing.
User management features enable team collaboration. Create multiple admin accounts with customized permissions. Each team member can manage their section while maintaining consistent branding. The platform logs all changes, ensuring accountability and easy troubleshooting.
The platform’s SEO tools help boost your visibility. Customize meta descriptions, add alt text to images, and generate clean URLs. Social media preview cards automatically format your content for sharing across different platforms.
Final Thoughts
LinkStack stands as a robust alternative to Linktree, delivering exceptional value for self-hosters. After running it for three months on my Synology NAS, I’m thoroughly impressed with its stability and performance. The container consistently uses less than 100MB of RAM and minimal CPU resources, making it perfect for home server setups.
The installation process, while technical, pays off with complete control over your data and zero recurring costs. LinkStack matches Linktree’s core functionality but adds the freedom to customize every aspect of your link landing page. The Aurora theme particularly shines, offering a polished, professional look that rivals premium services.
Performance metrics show consistent load times under 2 seconds, even with multiple concurrent users. The built-in analytics provide valuable insights without compromising visitor privacy – a significant advantage over commercial alternatives that often track extensive user data.
For tech-savvy users or small businesses, LinkStack is a clear winner. You get premium features without subscription fees, complete data ownership, and the flexibility to modify the codebase. However, complete beginners might prefer Linktree’s simpler setup if they’re not comfortable with Docker containers and self-hosting.
The platform’s active development and growing community support make it a sustainable long-term choice. Whether you’re a content creator, small business owner, or privacy enthusiast, LinkStack delivers professional-grade link management without compromise.
Troubleshooting Tips
Docker container won’t start? Check if port 8080 is already in use by another service. Change the port mapping in Container Manager to an available port like 8081 or 8082. This quick fix resolves most startup conflicts.
Database connection errors typically stem from incorrect environment variables. Double-check your .env file settings, especially the DB_HOST and DB_PASSWORD values. For SQLite users, verify the database path permissions are set correctly.
If you encounter a blank white screen after installation, clear your browser cache first. Still seeing issues? Check your reverse proxy configuration and ensure SSL certificates are properly installed. Most white screen problems trace back to incorrect URL settings in LinkStack’s admin panel.
Memory usage spikes? Adjust PHP memory limits in the container settings. Start with 256MB and increase if needed. Monitor resource usage through Container Manager’s built-in tools to find the sweet spot for your setup.
Can’t access LinkStack after restarting your NAS? Verify the container’s auto-start setting is enabled in Container Manager. Also check if your Docker network settings survived the reboot - sometimes they need manual reconnection.
For persistent upload failures, check your storage volume permissions. LinkStack needs write access to its media folders. Set appropriate ownership using the container’s file manager or through SSH if necessary.